Editing Fields
Within ConcordLink, several field types can be added and configured by administrators and, in some cases, agents. This page covers how to add, edit, and manage fields across clients, lenders, products, and obligations, as well as how to use audit history and workflows.
Lender field options
When adding a lender field, three configuration options are available through the + Lender Field button:
| Option | Description |
|---|---|
| + Add Value Options | Restricts the field to a predefined list of selectable values, such as a dropdown menu. |
| + Add Validation | Applies rules to ensure the data entered meets specific format or value requirements. |
| + Make Sensitive | Flags the field as sensitive, masking its value in the UI and restricting access to authorized users only. |
Adding a lender data field
- Navigate to the product menu and select Configuration.
- Go to Lender Fields and select + Lender Field in the upper-right corner.
- Enter a label, unique key, and optional description.
- Select the appropriate data type.
- Optionally add value options, validation, or mark the field as sensitive.
- Select Add Data Field to save.
Adding a project field
- Select the + Project Field button in the top-right corner of the Project Fields screen.
- Fill out the Add Project Data Field dialog with a label, key, description, and data type.
- Configure optional settings: inherited fields, value options, validation, and sensitive flag.
- Select Add Data Field to save.
Asset data fields
The Data Fields tab on the Account Homepage provides access to all data fields associated with the obligation. There are two types:
| Type | Description |
|---|---|
| First-class fields | Standard fields that exist on all obligations across the platform. Marked with a lock icon. Many are also visible on the Details tab. |
| Custom data fields | Additional fields created to support unique needs for a specific client, lender, product, or obligation. |
Viewing field details
- Select the down arrow on any data field row to expand it.
- View the field description, data type, and any constraints or permitted values.
Editing data fields
- Select the pencil icon on the field row to open the data field value editor.
- Enter the appropriate information and save.
Adding a client field
- Select the + Client Field button in the top-right corner.
- Enter the field label and select the data type from the dropdown. Options include text, number, date, dropdown, checkbox, currency, email, phone, URL, and text area.
- Add a description explaining the field's purpose.
- Toggle whether the field is mandatory or optional.
- Set a default value if needed.
- Set visibility: Public, Admin Only, Read-Only, or Hidden.
- If the data type is Dropdown, add the selectable options.
- Use the lock icon to set edit permissions: All Users, Admins Only, or Read-Only for All.
- Save the changes.
Add-on fees
- Go to Concord and select Products.
- Select the applicable product.
- Go to Configuration in the top navigation menu.
- Select Add-on Fees from the Configuration dropdown.
Grace periods
A grace period defines the number of days after a payment due date before a late fee or penalty is applied.
- Navigate to the relevant product or client settings.
- Locate the Grace Period field.
- Enter the number of days allowed (for example, 10 days).
- Save the configuration.
Write-off amounts
A write-off removes an uncollectable balance from active receivables.
- Open the account.
- Select the Actions menu.
- Select Write Off.
- Enter the amount to be written off and confirm.
Deleting or hiding fields
| Action | How |
|---|---|
| Hide a field | Select the lock icon and set visibility to Hidden. The field exists in the system but is not visible to users. |
| Delete a field | Select the info icon and choose Delete. Only administrators can delete fields. |
Audit history
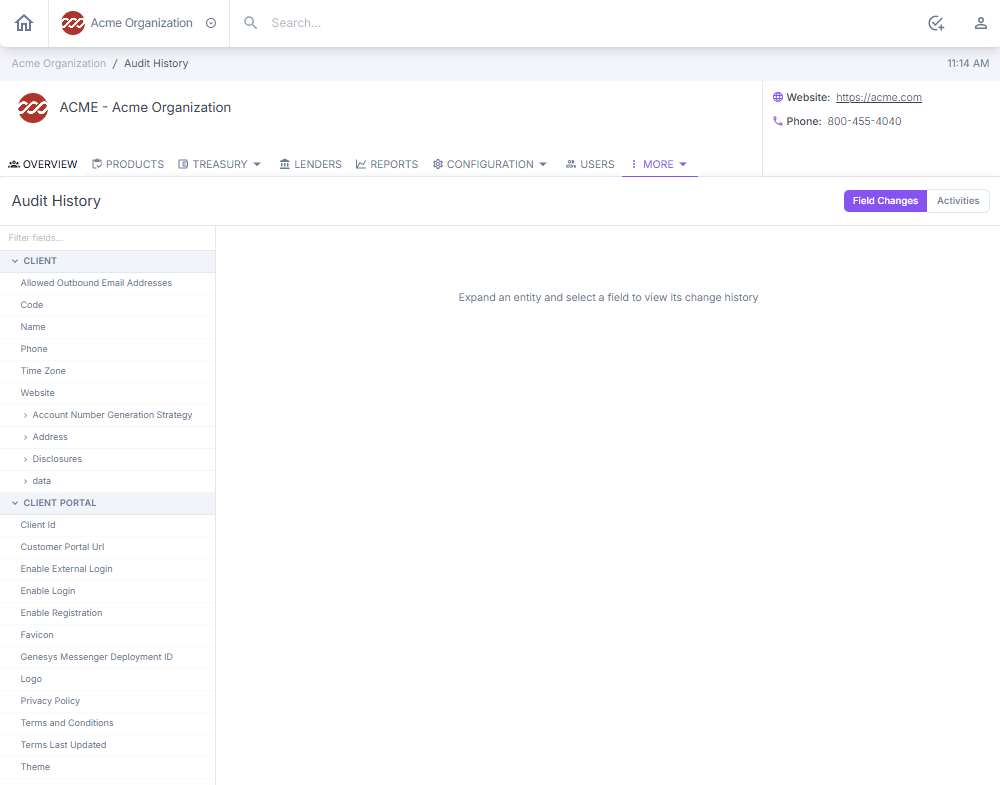
- Open the relevant record (for example, a product, obligation, or client).
- Select the More tab in the top navigation bar.
- Select Audit History from the dropdown.
In the Field Changes view, use the Filter fields search bar in the left panel to locate a specific field, then select a field name to load its change history.
Back to: Administrator Tasks and Actions