Portal Options
Branding, access controls, URL configuration, and troubleshooting the customer-facing portal.
Portal settings control the branding, access, and URL configuration of the ConcordLink customer-facing portal. Most settings are editable by administrators directly in the portal settings page. Other branding changes are configured at the client level by a Concord administrator.
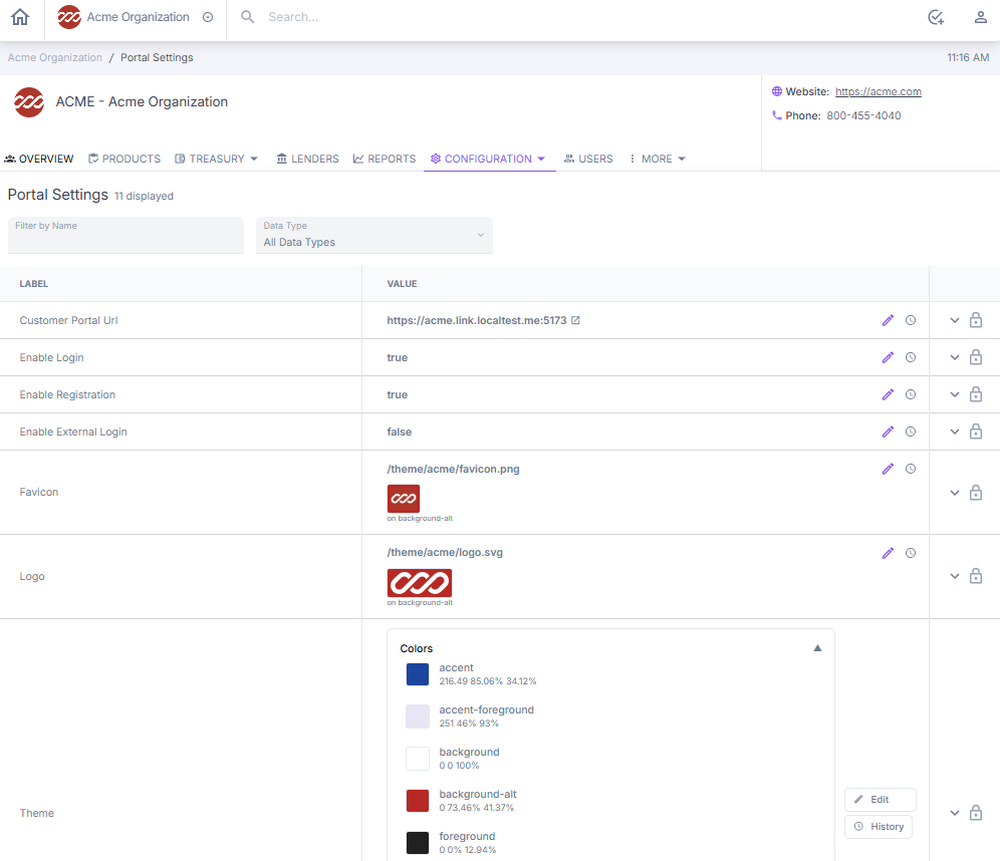
Figure Portal Settings page for the customer-facing portal.
Changing brand colors or theme
- Navigate to Portal Settings and scroll to the Theme section.
- Select Edit.
- Go to the primary color box in the table, select a new color, and save.
Updating the company logo
- Navigate to Portal Settings and scroll to the Logo section.
- Select Edit, upload the new logo image file, and save.
Logo files must be PNG or JPG format and under 5 MB.
Changing the portal URL
- Navigate to Portal Settings and scroll to the Customer Portal URL field.
- Select the edit icon, enter the new URL, and save.
- Test the new URL to confirm it is publicly accessible.
Disabling portal access
- Navigate to Portal Settings and scroll to the Enable Login toggle.
- Select Edit, set the toggle to False, and save.
- Verify the customer can no longer access the portal.
Disabling customer self-registration
- Navigate to Portal Settings and scroll to the Enable Registration section.
- Select Edit, set the toggle to False, and save.
- Verify new customers can no longer self-register.
Troubleshooting
Portal is not loading
- Confirm the customer portal URL is correct and publicly accessible.
- Verify the HTTPS certificate is valid and has not expired.
- Check that Enable Login is set to True in portal settings.
- Check firewall or security settings to ensure the URL is not blocked.
Branding changes are not displaying
- Clear the browser cache and refresh the page.
- Verify the color values and image file path are correct.
- Check that the color contrast meets accessibility standards.
- Confirm the changes were saved successfully in portal settings.
Back to: Administrator Tasks and Actions