Navigation, Setup, and Administrative Actions
The following sections provide guidance on searching in ConcordLink, managing notes and logs, reviewing audit history, and configuring portal settings.
Searching in ConcordLink
The search function lets you quickly locate obligations, obligors, clients, account numbers, and other records. Access it from the search bar at the top of any screen.
External agents and admins can only search within their assigned portfolio. Results will not include accounts belonging to other clients.
Internal Concord employees can search across all clients and portfolios.
Using the search bar
- Select the search icon in the top navigation bar or place your cursor directly in the search bar.
- Type a search term. Results appear automatically as you type — no need to press Enter.
- Look for the obligor's name, phone number, email address, or other identifying information.
- Select a result to navigate directly to that obligation or record.
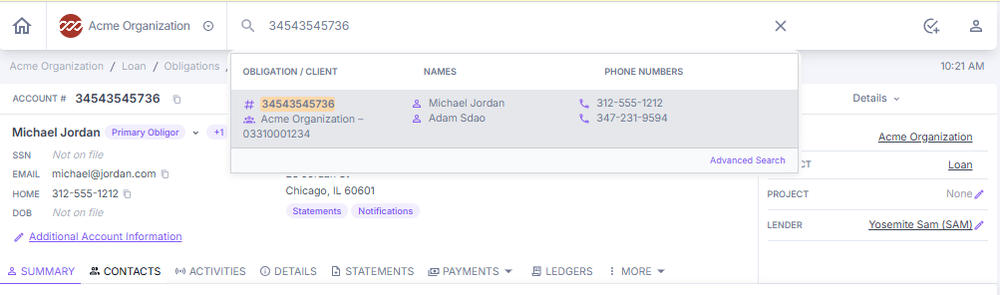
Partial entries return all matching results across names, account numbers, and phone numbers. Searching by account number, phone number, or last name returns the most targeted results.
Notes
Notes are added and saved on the obligation page. Pinned notes persist at the top of the navigation pane. Notes are also filterable under Activities.
Who can add notes: External agents (Editor role), external admins, and internal employees. Viewer-role external agents cannot add notes.
Adding a note
- Locate the note card on the right side of the account.
- Select Add Note or the + icon in the top-right corner of the card.
- Enter the note text in the field provided.
- If it's a payment note, add the resolution, reason for delinquency, follow-up date, or other important details.
- Save the note.
.png)
Logs
Who can view logs: External admins (own portfolio) and internal employees. External agents do not have access to the logs view.
Logs are displayed in a table with the date, level, and message. Select the chevron on the right of any row to expand it and view additional details about that log event. Access Logs from the Logs tab in the client navigation bar, or via More → Job History / Audit History.
Filtering logs
- Check logs after any data import or export to confirm records processed correctly and no errors occurred.
- Use the Error and Critical log level filters when troubleshooting to quickly surface problems.
- Use the ObligationId filter to investigate issues related to a specific account.
- Use a keyword search to quickly identify problem entries.
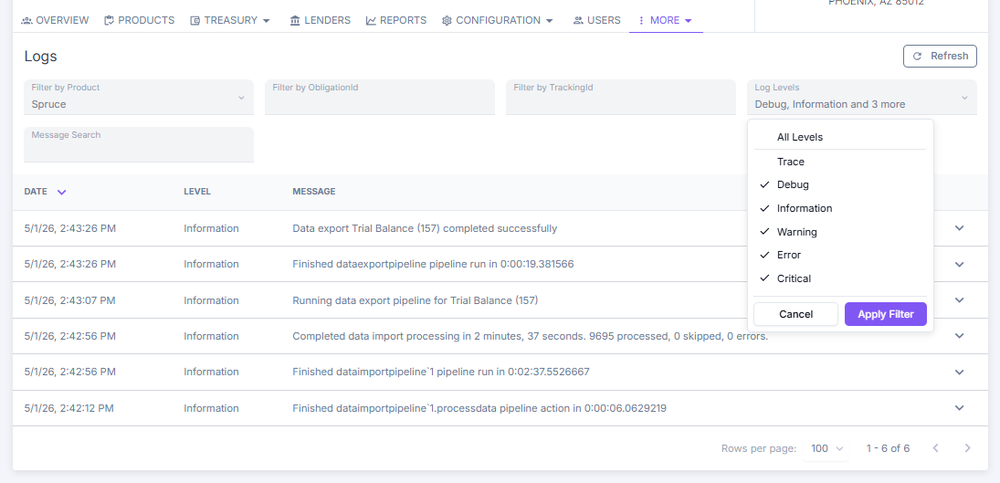
More menu — Job History and Audit History
The More menu in the top navigation bar provides quick access to Live Jobs, Job History, and Audit History.
Audit history
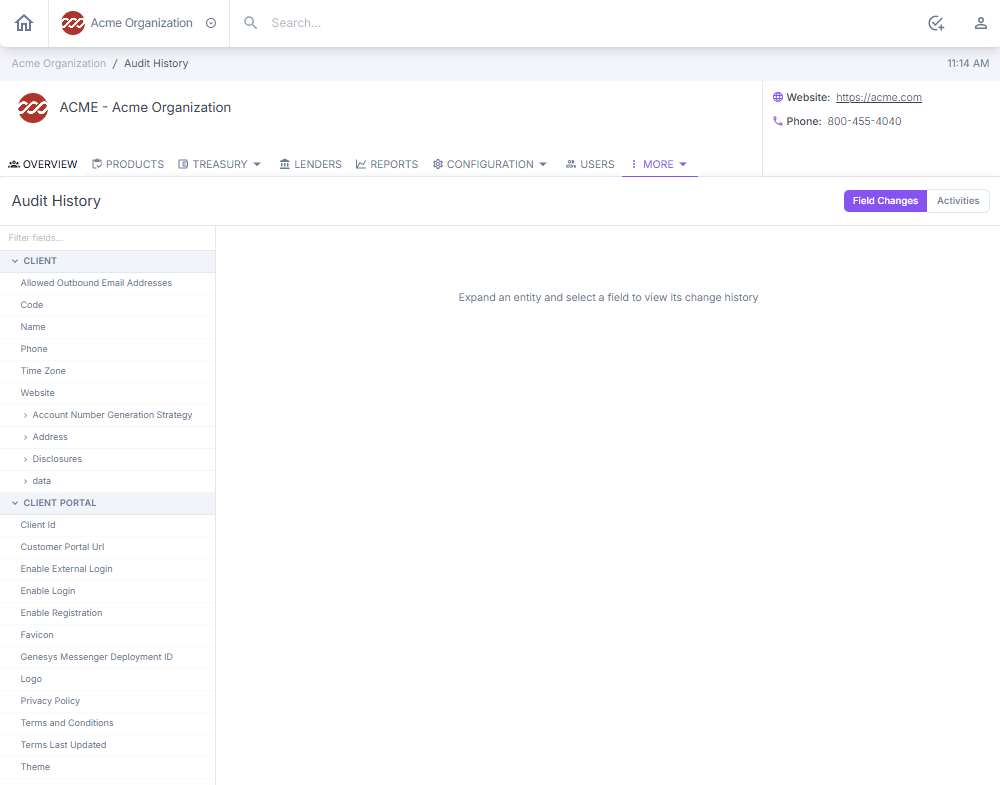
Audit History tracks user-made changes; Logs tracks system-made changes. Two viewing modes are available:
- Field changes — shows a history of changes made to specific data fields
- Activities — shows a log of actions and events associated with the record
External agents and admins can view account-level audit history in read-only mode. They cannot pull audit data for regulatory examinations or access audit history at the product or platform level.
Internal employees have full audit history access across products, obligations, and clients.
Navigating to audit history
- Open the relevant record (for example, a product, obligation, or client).
- Select the More tab in the top navigation bar.
- Select Audit History from the dropdown.
- Select either Field Changes or Activities view.
- Filter the results as needed.
Portal settings
Who can access portal settings:
External admins can configure portal settings for their own client's portal only — branding, logo, URL, and borrower self-registration.
Internal Concord employees can configure portal settings for any client. Some branding changes at the platform level are managed by a Concord administrator.
External agents do not have access to portal settings.
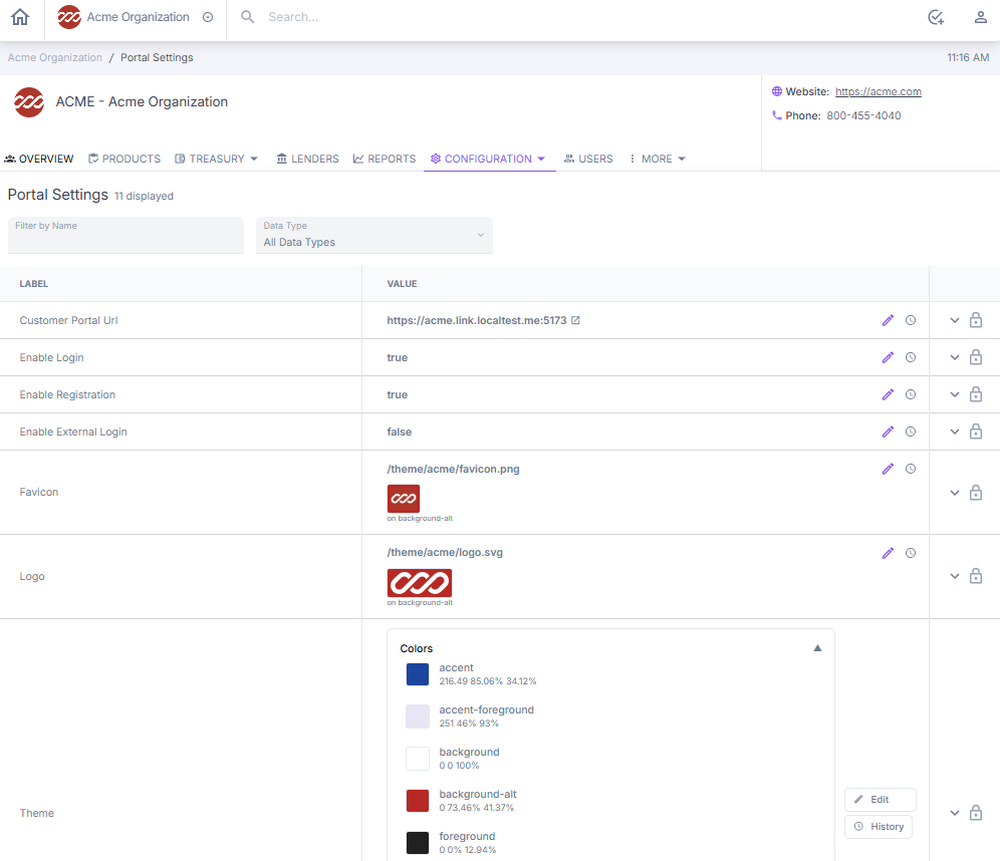
Portal settings control the branding, access, and URL configuration of the ConcordLink customer-facing portal.
Changing brand colors or theme
- Navigate to Portal Settings and scroll to the Theme section.
- Select Edit.
- Go to the primary color box in the table, select a new color, and save.
Updating the company logo
- Navigate to Portal Settings and scroll to the Logo section.
- Select Edit, upload the new logo image file, and save.
Changing the portal URL
- Navigate to Portal Settings and scroll to the Customer Portal URL field.
- Select the edit icon, enter the new URL, and save.
- Test the new URL to confirm it is publicly accessible.
Disabling portal access or self-registration
- Navigate to Portal Settings and scroll to the Enable Login or Enable Registration toggle.
- Select Edit, set the toggle to False, and save.
- Verify the change is active.
Logo files must be PNG or JPG format and under 5 MB.
Next: Continue to Call Communication Tasks for managing contacts and logging calls.